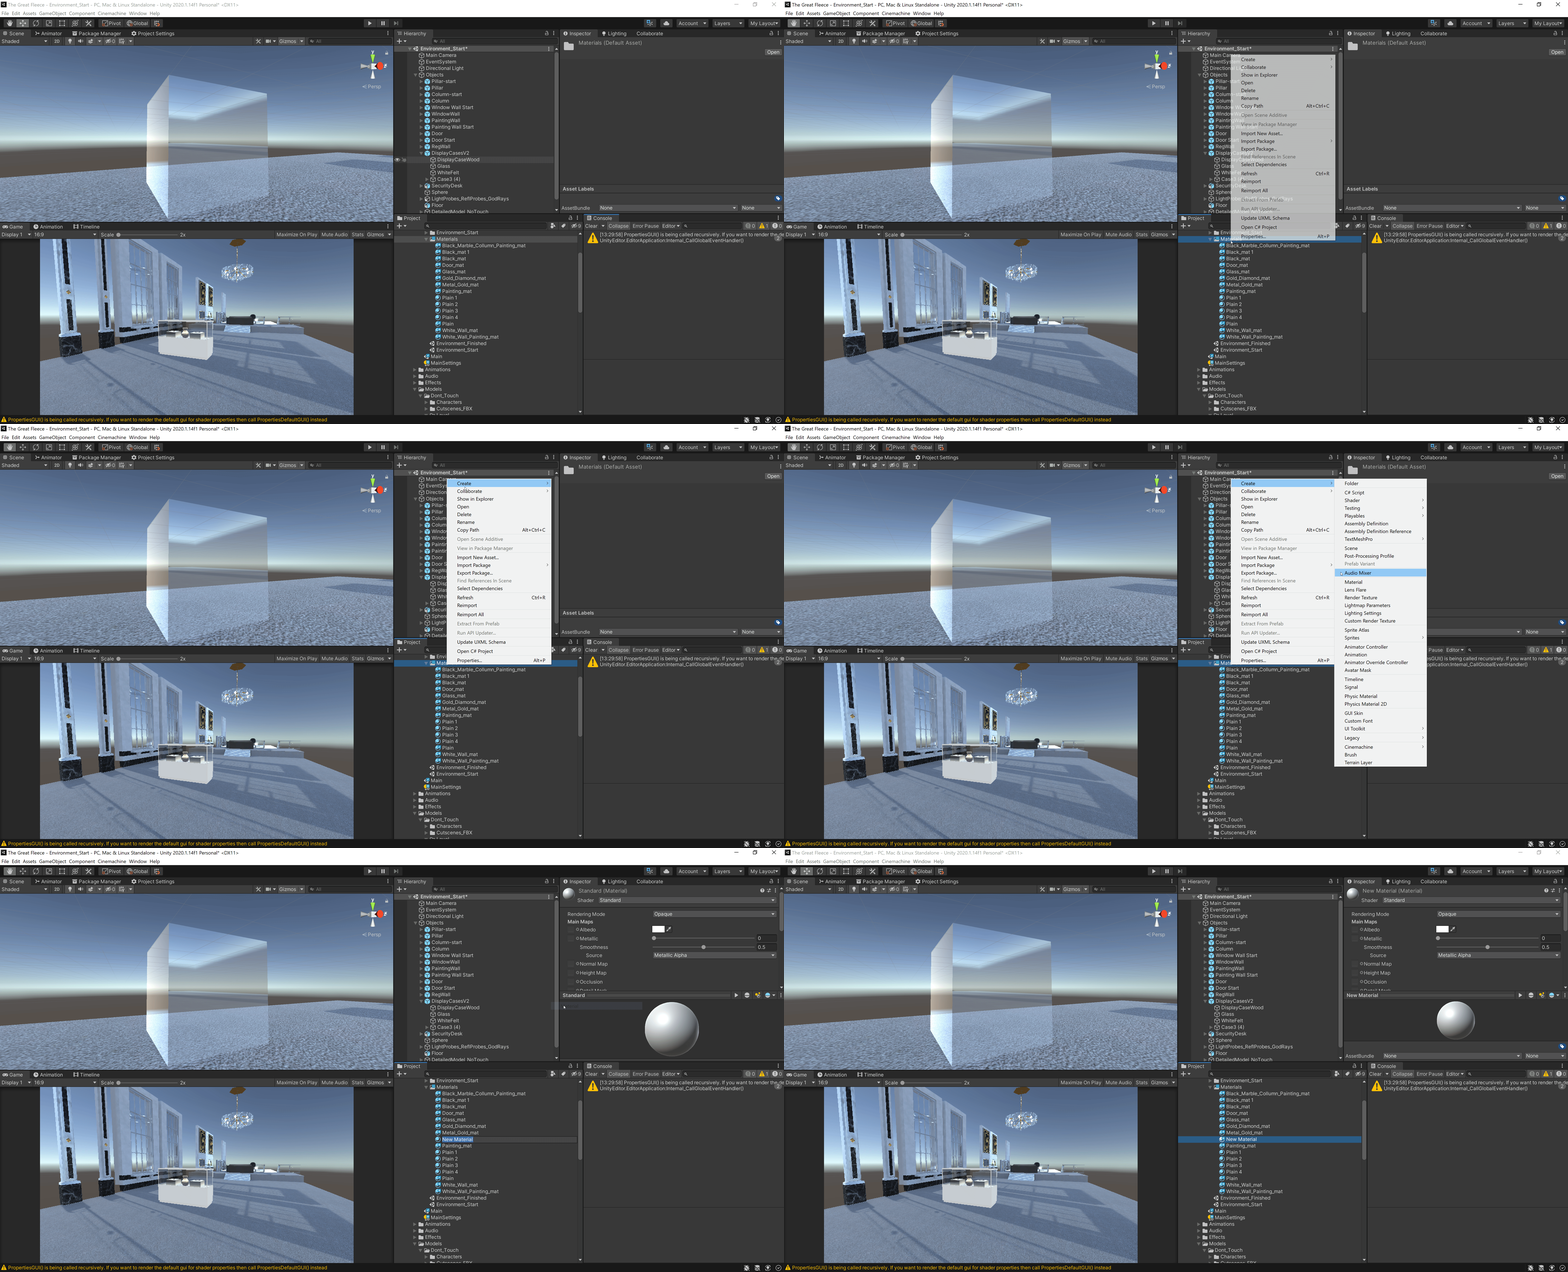
To start, let’s create a material. You can do this by right-clicking within the project menu and selecting Create>Material. I’m gonna name the material for this example “Glass_mat”.


Once you have a material created, you can customize a number of things within it.
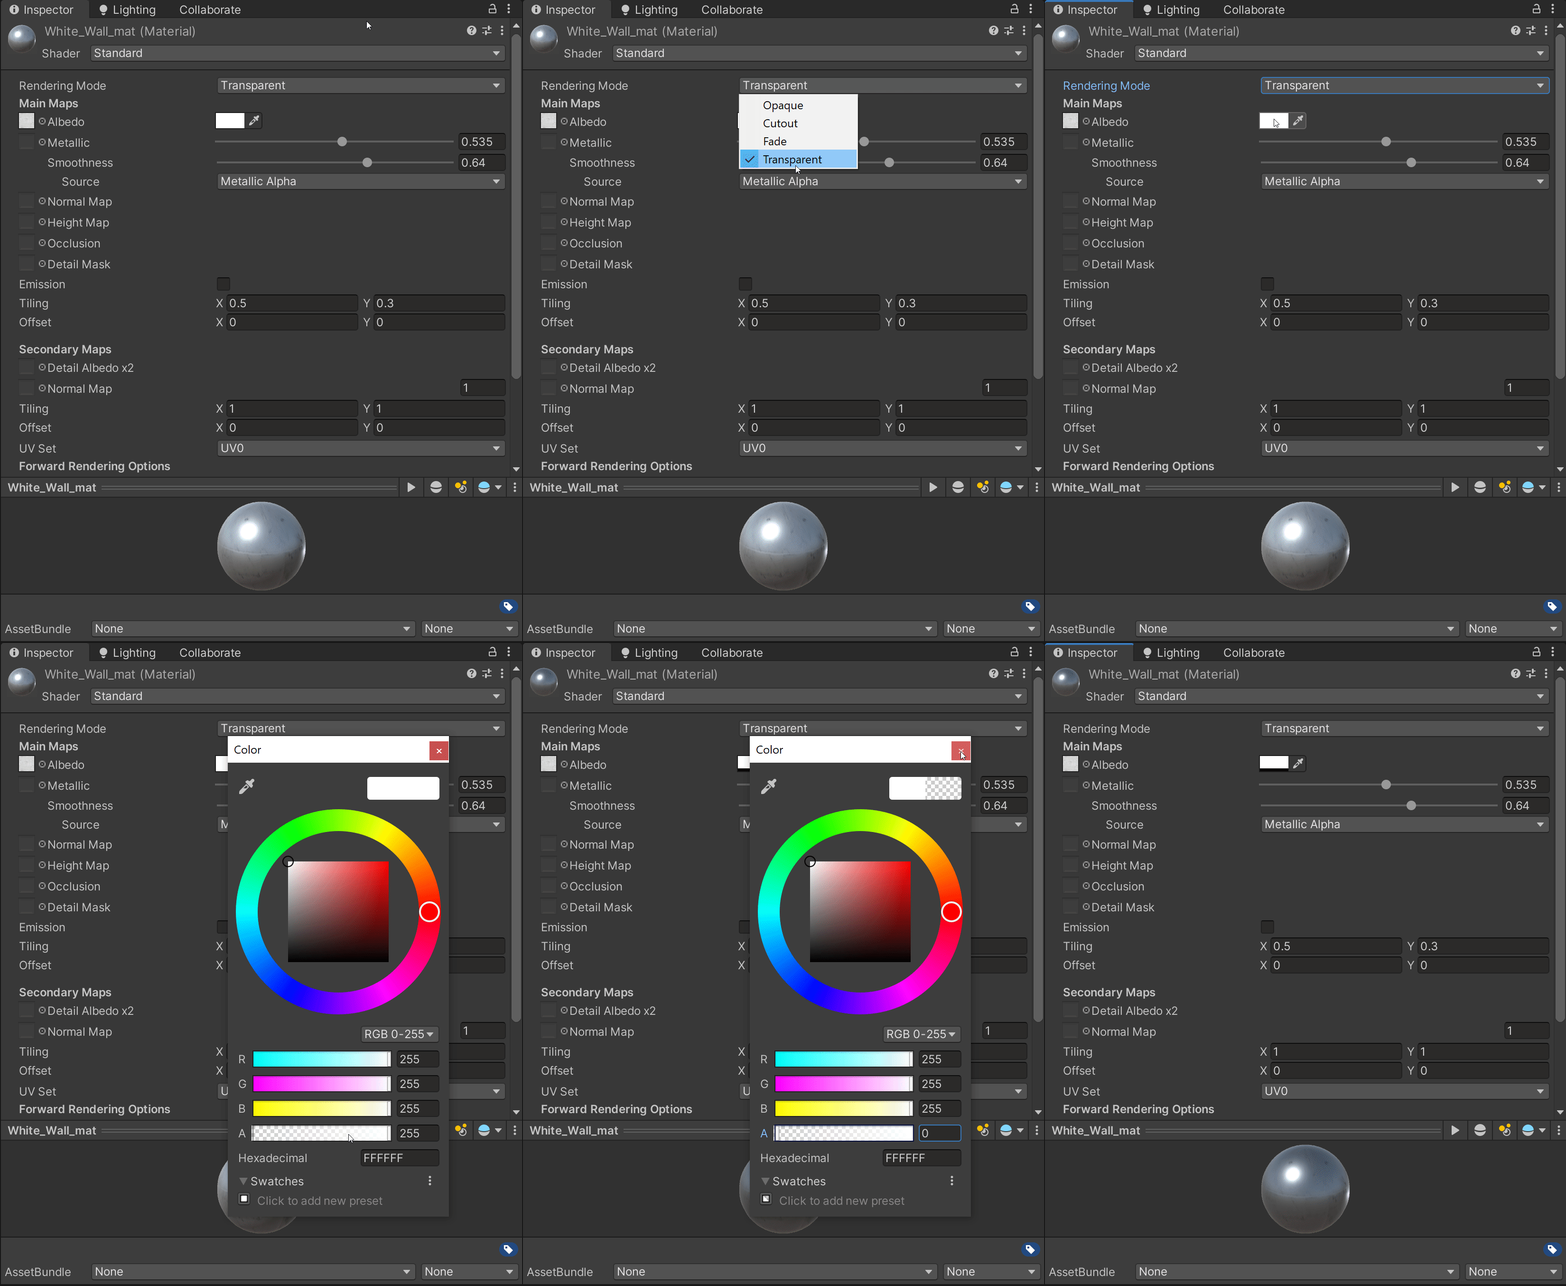
To create transparent objects such as glass, change the “Rendering Mode” option to “Transparent”.
Clicking on the “Albedo” option’s color box allows you to change the RGB color value, as well as the material’s “Alpha” which affects its transparency.
The higher the Alpha, the less transparent the material is. A zero alpha would leave something completely transparent.

Here is an example of a cube with a standard shader. The rendering mode is set to “Opaque” and a texture of marble stone is applied to the “Albedo”.

Here is an example of a cube with a standard shader once again, but this time the rendering mode is set to “Transparent”, the “Smoothness” to 1, and the “Alpha Channel” within the “Albedo Color Picker” is set to 0.
