A “Dolly Track” is a path that you can create to move an attached virtual camera. It allows you to move the camera around the scene in a specified and controlled manner for the production of cinematics.
To begin, select “Cinemachine” from the toolbar at the top left of your Unity editor and select “Create Dolly Camera With Track”. Notice that when you created your dolly track, Unity also created a Cinemachine Virtual Camera alongside it. This is done by default. You can delete this camera if you are wanting to use a different one, or just use the one provided.

Once you have your dolly track made, you will notice that it doesn’t have a physical gizmo or object visible in your scene.
Simply select the button “Add a waypoint to the path” to add your first waypoint and make your dolly track visible.


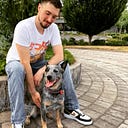
It should look like this now, though depending on if you have the waypoint highlighted it may look like the second image below.
The 0 represents the waypoint’s number in the track’s order. When the camera travels along the track, it will target the waypoints by their number.

You can add new waypoints by simply selecting the “+” button under “Path Details” on your dolly track.
Use the Gizmos as shown in the example to adjust the position and curvature of your waypoints.

Next, you will need to connect your camera to your dolly track. To do this, select your virtual camera and drop down the panel titled “Body”.
Then change it from “Transposer” to “Tracked Dolly”.
You will see an empty path reference now which is asking for a Cinemachine Path Base. This is where you can attach your dolly track.
Notice the parameter for “Path Position”. That is where the waypoints order number comes into play. As this number changes, the camera will move along the track to that number’s position in accordance with the waypoint numbers. You will need to add an “Animator Track” to your timeline in order to adjust this number and thus move your camera along the track.
You will need to create a new “Timeline” and add the “Playable Director” component to your cutscene game object. This can be done by selecting create in the Timeline editor. Once created, you will need to add the camera to your Timeline. Simply right-click in Timeline and select “Cinemachine.Timeline>Cinemachine Track”. Then drag and drop your “Main Camera” into the reference. Then drag and drop your “Virtual Camera” into the editor to create the track.

Lastly, you’ll need to add an “Animation Track” and link your virtual camera. Hit record, and go to the body section of your virtual camera. Change the “Path Position” here to 0 to establish your initial starting keyframe location. Then slide the “Keyframe Marker” to the time that you want the camera to reach its final destination. Select record on the animation track again but this time change the “Path Position” to the highest waypoint number you have.
There you go, a fully animated camera on a Dolly Track!